How To: Replace Velcro Strip on Seat Cushion & Canoe
The below instructions apply if you need to:
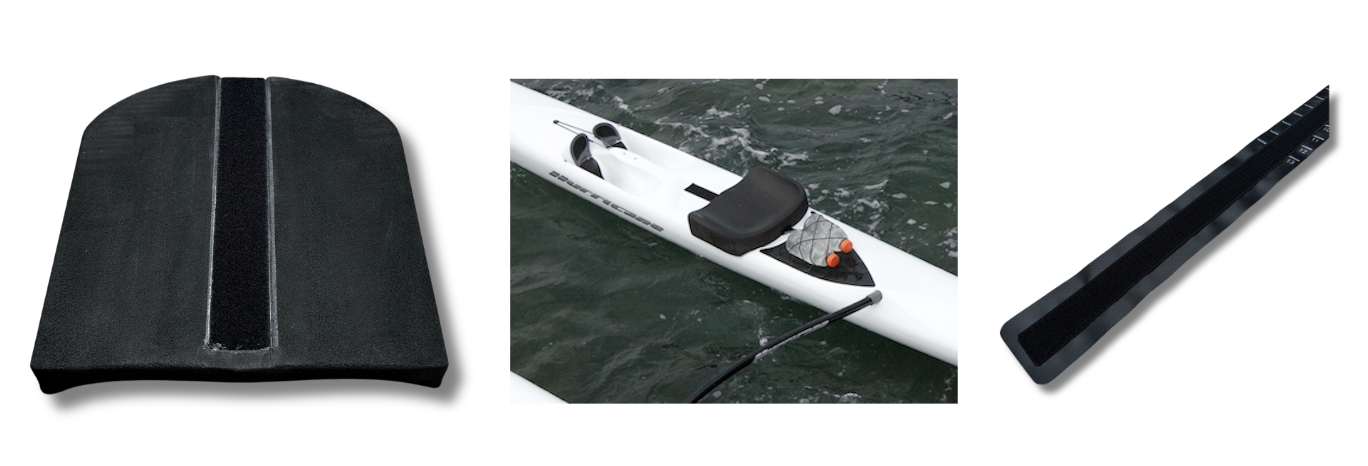
- Reattach the velcro on your current seat/canoe
- Bought a replacement velcro strip to swap out on your current seat/canoe
- Bought a replacement seat cushion and need to attach the included velcro to your seat and canoe
What is needed:
- Soap & water
- Citrus cleaner (if desired)
- Sandpaper or sanding block (recommended)
- The object that you are applying the velcro to – ie seat cushion and/or canoe
- Small paintbrush, popsicle stick, etc to apply glue
- Stable work area for seat cushion and/or canoe
- Newspaper, tarp, or an old beach towel to protect work surface while applying glue
After testing just about every adhesive out there, we recommend using Barge All-Purpose Cement Rubber or E6000 Adhesive to replace the velcro on your canoe or on your seat cushion.
You should be able to find either brand at your local hardware store, if you live in a more remote area it is also easy to find online.
Some notes that may help you choose between one or the other:
- Barge Cement Rubber Pros: Dries fast, ~ 10-15 mins, recommended to leave it for a full day to cure if possible
- Barge Cement Rubber Cons: Can be a little tricky to work with if you’ve never used it before, be sure to read all directions
- E6000 Pros: Easy to work with
- E6000 Cons: Takes longer to dry – it is important to let it sit for 3 full days (ideally with a weight pressing down on it)
_____
Step 1: Clean your surface(s)
- Probably the most important step in the process is to make sure any surfaces that you are applying adhesive to are clean and dry. Any salt, dirt, dust or sand will prevent the adhesive from making a nice bond.
- Wash thoroughly with soap & water. If you are replacing the velcro on the canoe side it is a good idea to use a citrus cleaner like Zep or Citrasolv as well, this will not damage your canoe.
Step 2: Allow surface(s) to dry thoroughly
- The canoe will dry fairly quickly, but allow 24 hrs for the foam of your seat to properly dry.
Step 3: Prep your surface(s)
- Using some sandpaper or a sanding block, lightly scuffing up the surface(s) will help to give the adhesive something to stick to.
Step 4: Apply your chosen adhesive
- Read all warnings and instructions before you get started based on which adhesive you chose.
- Apply a thorough, even layer to both surfaces.
- Note on Barge cement – this is a dry-to-dry adhesive, it’s not intuitive if you haven’t used it before. Apply to both surfaces and let dry according to the instructions before adhering. Here is a handy video with some tips on using Barge cement for reference.
- Note on E6000 – when applying to non-porous surfaces (ie your canoe hull) it is recommended to stick the two items being glued together then pull apart for 5 minutes before fully setting. The fumes can be a little strong, so it’s a good idea to apply outside or in an area with good ventilation, or wear a mask or respirator while applying.
Step 5: Let dry properly
- Follow all warnings and instructions for dry time based on which adhesive you chose, in general Barge Cement needs about 3 days, and E6000 needs about 1 day to dry thoroughly.
Once dry, you can get back on the water with a seat that stays firmly attached to your canoe :)